|
Add
and Modify Applicants
Manually Adding
and Modifying
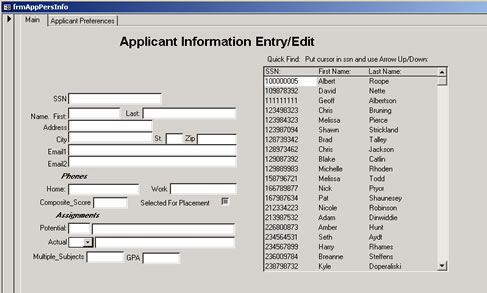
To manually add in a new applicant, click on the "Add Applicant"
button on the switchboard. To create another applicant, click on the
button at the very bottom that is a triangle pointing to an asterick.
This will create a new applicant, and all of the information can be
stored in here. Simply repeat until all of the desired applicants
are entered. To close out, click the "X" in the upper right
of the window. The applicants have been added.
To Modify an applicant,
select the applicant from the main operating window, or choose the
applicant on the right hand side of the "Applicant Information"
Screen. Change any information that is needed and then click the "X"
to save the changes and close out of the window.
Adding Location
Preferences
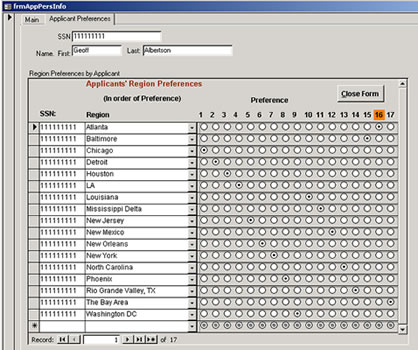
In order to add the location
preferences, bring up the applicant information. Click on the "Applicant
Preferences" tab. The location can be selected in the drop down
box and the selected ranking can be chosen as well. To save, click back
over to the "Main" tab.
Bulk Insert
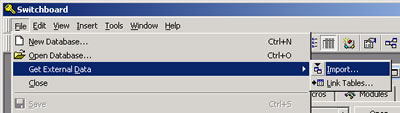
- To do a bulk
insert, click on "file" then choose "get
external data" then choose "import".
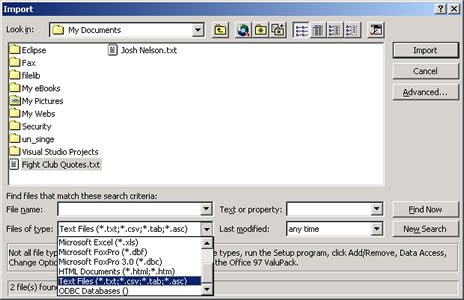
- Change the "files
of type" to "text files". Browse for you
data, and highlight it. Click on "Import" once
it is selected.
- Keep the option
"delimited" and you should see the sample information.
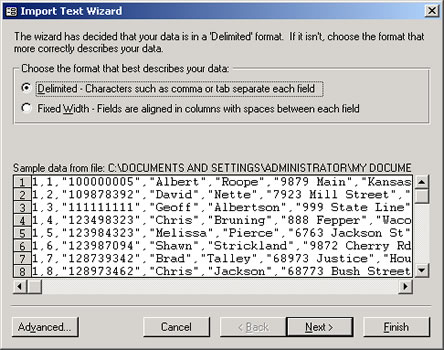
- Click "next"
and select as your delimiter "comma".
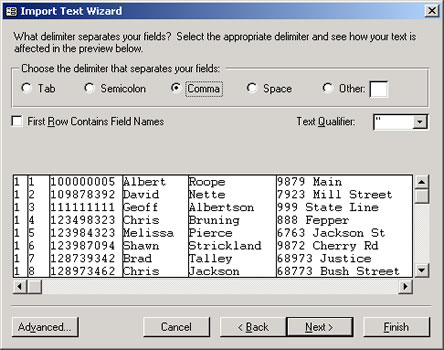
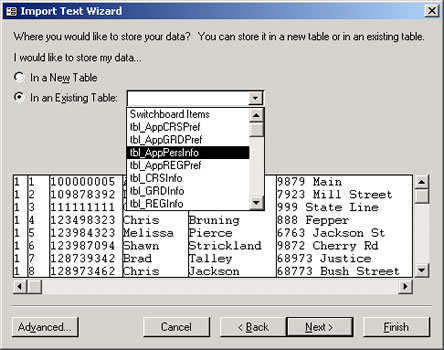
- Click "next"
and choose "In and existing table" and choose "tbl_AppPersInfo".
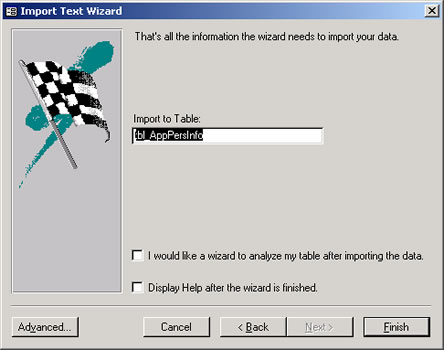
- Click "Finish".
The new applicants are added. Some notes about this process are
listed below.
Comma Delimited
Format - To perform a bulk insert, first you must have the
information in a comma delimited format. The format is as follows:
- 1 or 0 - Signifies
if the applicant is to be placed or not. A 1 is for placement, a
0 is to not be placed
- blank - Leave
this field blank, it is for internal processing purposes only
- "123456789"
- SSN, this is the 9 digit SSN of the applicant. No dashes are required.
- "First Name"
- This is the first name of the applicant
- "Last Name"
- This is the last name of the applicant
- "1234 Anywhere
St" - This is the address of the applicant
- "City"
- This is the city for the applicant
- "MO"
- This is the 2 letter abbreviation for the applicant's state.
- "12345"
- This is the zip code for the applicant.
- "email@domain.com"
- This is the first email address for the applicant
- "email2@domain2.com"
- This is the second email address, optional.
- "(123) 456-7890"
- This is the home phone
- "(123) 456-7890"
- This is the work phone, optional.
- blank - leave
this field blank
- 0 - These are
to be left as zeros
- 0 - These are
to be left as zeros
- 0 - These are
to be left as zeros
- 0 - These are
to be left as zeros
- 0 - These are
to be left as zeros
Sample
-
1,,"123456778","Josh","Nelson","1954
E Main Street","Independence","MO","64055","myemail@yahoo.com",,"(432)
462-3462","(234) 623-4624",,0,0,0,0,0
Region Preferences
to be done Manually - If doing a Bulk Insert, keep in mind
that location preferences will still have to be made.
|